Drag And Drop Rows
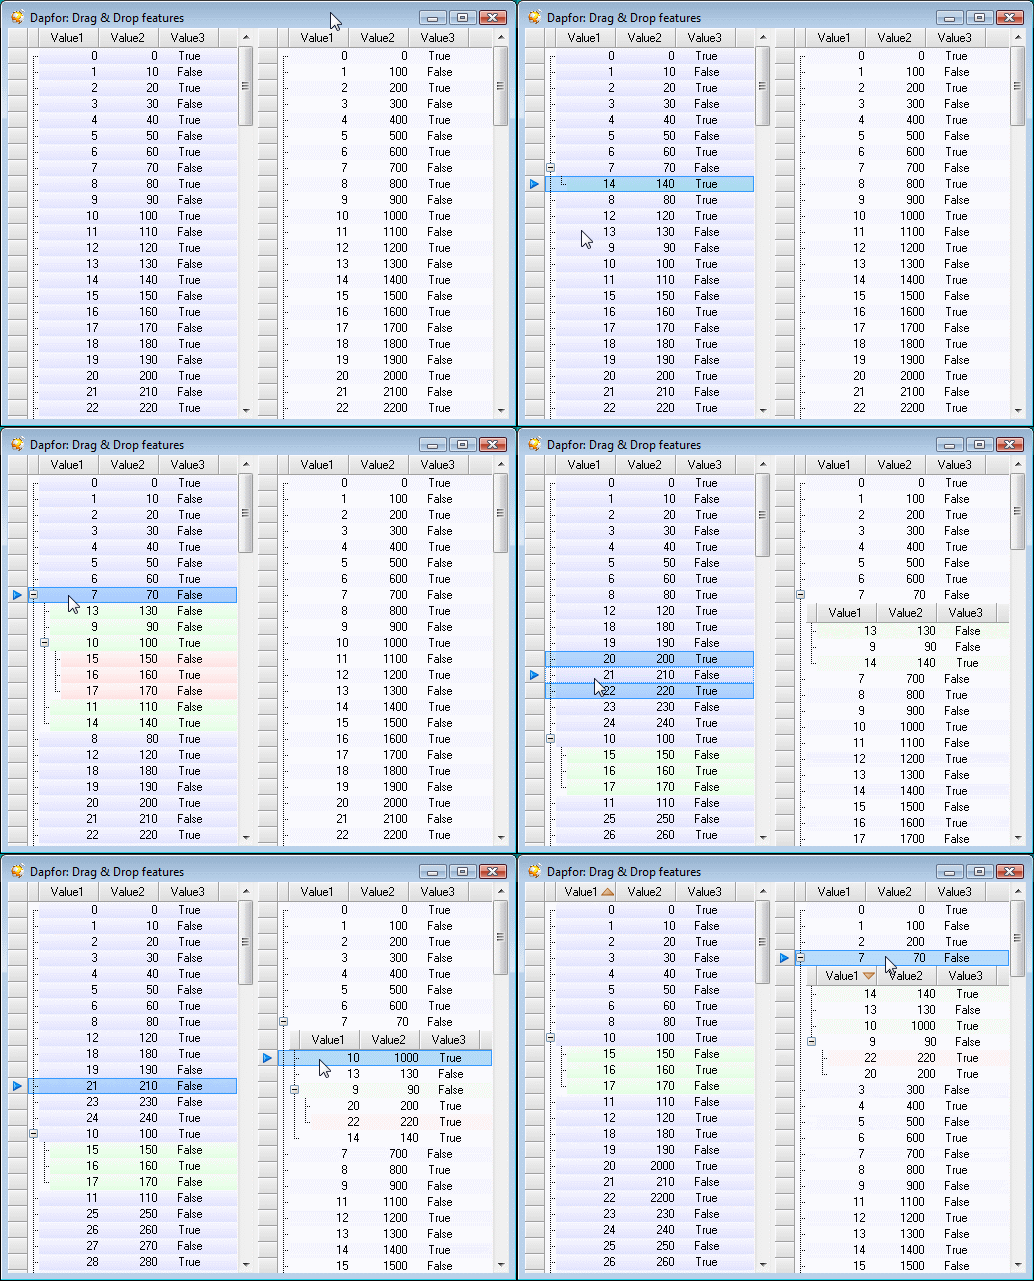
Starting from version 2.5.0 the .Net Grid supports drag & drop operations with grid rows, moving the rows ithin a grid and between grids, changing hierarchy, exporting data to applications like Word and xcel in text format and importing data from other applications. The grid has been initially designed to separate data from its presentation. Rows may contain data of any types: objects of arbitrary classes, string arrays, collections with IEnumerable implementations, etc.
See data used in the grid for more details.

Drag & drop feature was designed with full consideration of separating data from its presentation, i.e. data itself is not copied or cloned and all operations are performed only with grid rows. A row is an object that determines data location in the grid, visibility, data hierarchy and selection. Rows also contain references to data objects that do not change as it has already been said above.
All drag & drop settings are contained in Grid.DragAndDrop property. The following properties should be set to true to use drag & drop feature:
Grid.AllowDrop = true;
Grid.DragAndDrop.Enabled = true;
To start drag & drop operation the end user should place the cursor over grid rows, left-click and start moving the row. First of all, drag & drop operation raises Grid.DragBegin event that can be used to define available drag & drop effects and content and, if desired, to set DragContentBeginEventArgs.Data property that is an
object passed to Control.DoDragDrop() method that can be used to export data to Word or Excel.
The following events are called during drag & drop operation when the cursor is moved to the target grid, passes over it and leaves it:
Grid.DragEnterContent;
Grid.DragOverContent;
Control.DragLeave;
The grid calculates the required values and data insertion position, checks whether drag & drop is possible and enables customization of drag & drop effects, data location and data hierarchy. During drag & drop operation the grid shows data insertion location indicators that enable the end user to see where exactly the data will be inserted, including its position in hierarchy. The grid has user-friendly interface. If during drag & drop operation the user keeps the cursor over a row for 1 second, this row is automatically expanded. If the grid has a vertical scrollbar, the grid automatically scrolls if the user moves the cursor above or below the grid.
Data insertion To insert data into the grid the end user moves the cursor over the grid with left mouse button pressed and the grid highlights the place of data insertion. Two data insertion modes are available:
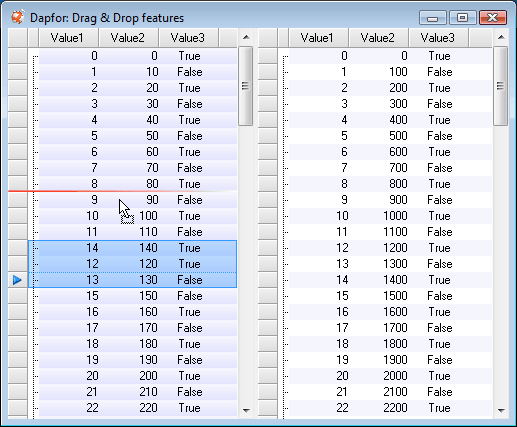
- Flat mode, when data is inserted above the row at the current cursor position at the same hierarchy level.
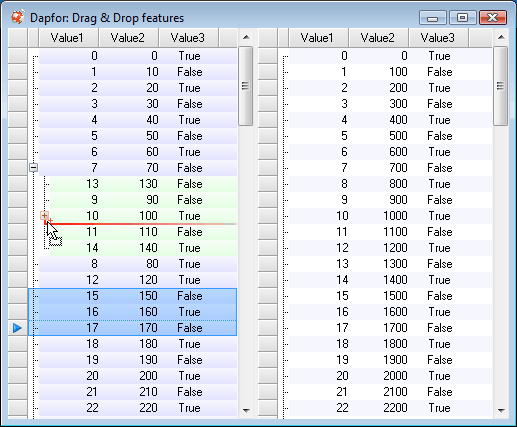
- Data can also be inserted as a child row of the row at the current cursor position.
Two different indicators are used to specify data insertion mode:
Inserting data in flat mode:

Inserting data in hierarchical mode:

There are 3 other modes that control data insertion and are controlled by Grid.DragAndDrop.DropMode property:
- Flat mode only
- Hierarchical mode only
- Combined mode. In this mode the grid has special areas that can be used to set data insertion mode by placing the cursor over those areas. For flat mode such areas are any place above the row except for small +/- icon. To insert data in hierarchical mode you have to place the cursor over this icon. It is also possible to switch from flat mode to hierarchical mode using Shift key.
In accordance with possible DragAndDrop effect, the grid supports 3 operations: Copy, Move and Link
- Copy. This operation creates new rows for data set in DragDropContentEventArgs.Content. DragDropContentEventArgs.Content often contains a collection of rows created in the beginning of drag. In such case hierarchy, selection and expansion are preserved for newly created rows. If DragDropContentEventArgs.Content contains other data than Row, the new rows shall be created with relevant DataAccessor. In any case data itself is not copied. If data supports INotifyPropertyChanged interface, newly created rows will also get data object notification.
- Move. Data is moved with all information of hierarchy, expansion and selection either within a grid or between grids.
- ink. This operation is similar to Copy, but in this operation DragDropContentEventArgs.Content may contain only Row collection.
Key modifiers
Key modifier table enabling to set data insertion method is provided below:
| Key | Designation |
| Mouse move | Move data |
| Mouse move + Ctrl | Copy data |
| Mouse move + Alt | Link to data |
Mouse move + Shift
| Changes insertion mode from flat mode to hierarchical mode |
Drag & drop customization The grid provides a lot of customization opportunities in the form of event subscription that enable you to modify insertion content, mode and location and to control visual effects of drag & drop operation
- Grid.DragBegin - controls content and initiation of drag & drop operation. When grids copy or move data in an application they work with content. If you need to send data to Excel, you can set a Data object containing image, string or any other object implementing IDataObject interface. This object is transferred to Control.DoDragDrop method enabling data exchange with external applications.
- Grid.DragEnterContent and Grid.DragOverContent enable controlling various visual effects and defining data insertion location, data hierarchy and inserted content.
- Grid.DragDropContent enables direct control of content insertion. If data is inserted from another grid, DragDropContentEventArgs.Content should be defined in advance. You may call any content insertion operation, i.e. DoCopy()/DoMove()/DoLink(). Data will be inserted to the current position via DragDropContentEventArgs.TargetRow and DragDropContentEventArgs.TargetPosition. These parameters can be modified at any moment. If drag & drop operation is initiated by another control or outside the application, DragDropContentEventArgs.Content will have null value. In this case data can be received from DragContentEventArgs.Data, which is an IDataObject object. DragDropContentEventArgs also provides methods for inserting data to the grid via DoCopy(...)/DoMove(...)/DoLink(...) to the position determined by current value of TargetRow and TargetPosition. This provides a possibility to import data to the grid from external applications.
An example of exporting/importing data to/from Excel:
To import data, Excel sends a text string formatted with the above-described method. The grid cannot process such string directly, but it has powerful features for transforming data from Excel format to the format of application business data. Below is an example demonstrating exporting/importing data to/from Excel.
private void OnDragBegin(object sender, DragContentBeginEventArgs e)
{
StringBuilder sb = new StringBuilder();
foreach (Row row in e.Content)
{
if (sb.Length > 0) sb.AppendLine();
StringBuilder sbRow = new StringBuilder();
foreach (Column column in row.Header)
{
if (sbRow.Length > 0) sbRow.Append("\t");
sbRow.Append(row[column.Id].Text);
}
sb.Append(sbRow);
}
e.Data = sb.ToString();
}
private void OnDragOverContent(object sender, DragContentEventArgs e)
{
if (e.Content == null)
{
e.Effect = DragDropEffects.Copy;
}
}
private void OnDragDropContent(object sender, DragDropContentEventArgs e)
{
if (e.Content == null)
{
string data = e.Data.GetData(typeof(string)) as string;
if (!string.IsNullOrEmpty(data))
{
string[] lines = data.Split(new string[] { Environment.NewLine }, StringSplitOptions.RemoveEmptyEntries);
foreach (string line in lines)
{
string[] values = line.Split(new string[] { "\t" }, StringSplitOptions.None);
e.DoCopy(values);
}
e.Handled = true;
}
}
}